
DIY Wall Sconce Cord Cover


I've received so many questions lately on how I added sconce cord covers to our bedroom wall sconces on either side of our bed! And...can I get a round of applause for doing this by myself?! I have a video highlight on the DIY you can see HERE, but I wanted to do a step-by-step blog tutorial with the details if you're a reader like me!
I know some people like to hide the wire that comes down from sconces on the wall, however, I decided to embrace the wire instead! This is such a simple DIY that didn't take me long at all.
First, you'll need wire tubing you can purchase at Home Depot. You can also find it HERE!

Next, spray paint! I had 4 different gold spray paints on hand, so I decided to test each one of them against the wall sconces to see which one matched best. I had an all-in-one spray paint and primer that worked perfectly! You can find the exact color HERE!
Pro tip for spray painting: make sure you apply with light and even strokes! It will be more even this way.

After the spray paint was completely dry, it was time to add the tubing to the cord to make it look like an extension of the light. I had to remove the plastic piece that holds the cord in place because it was interfering with the tube laying flat against the sconces. It was super easy to remove! There's a seam on the side of the tube, so I simply pushed the wire into the seam.
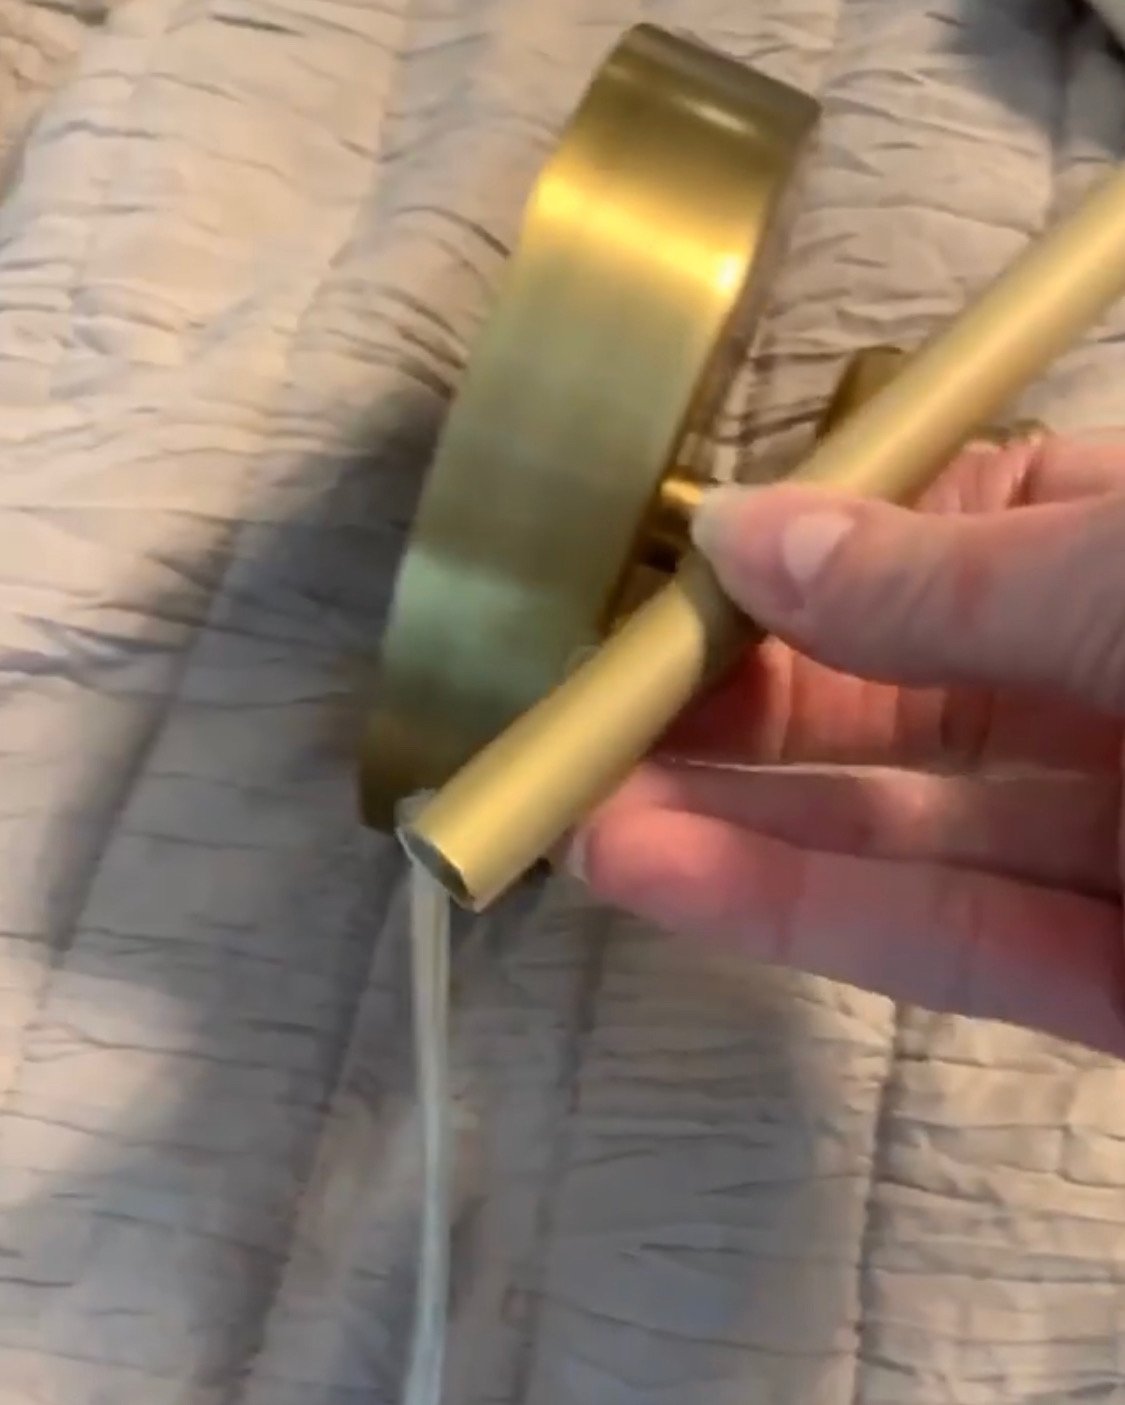
The tubing comes with a peel and stick feature so once the cord was completely covered, it was time to line it up on the wall!
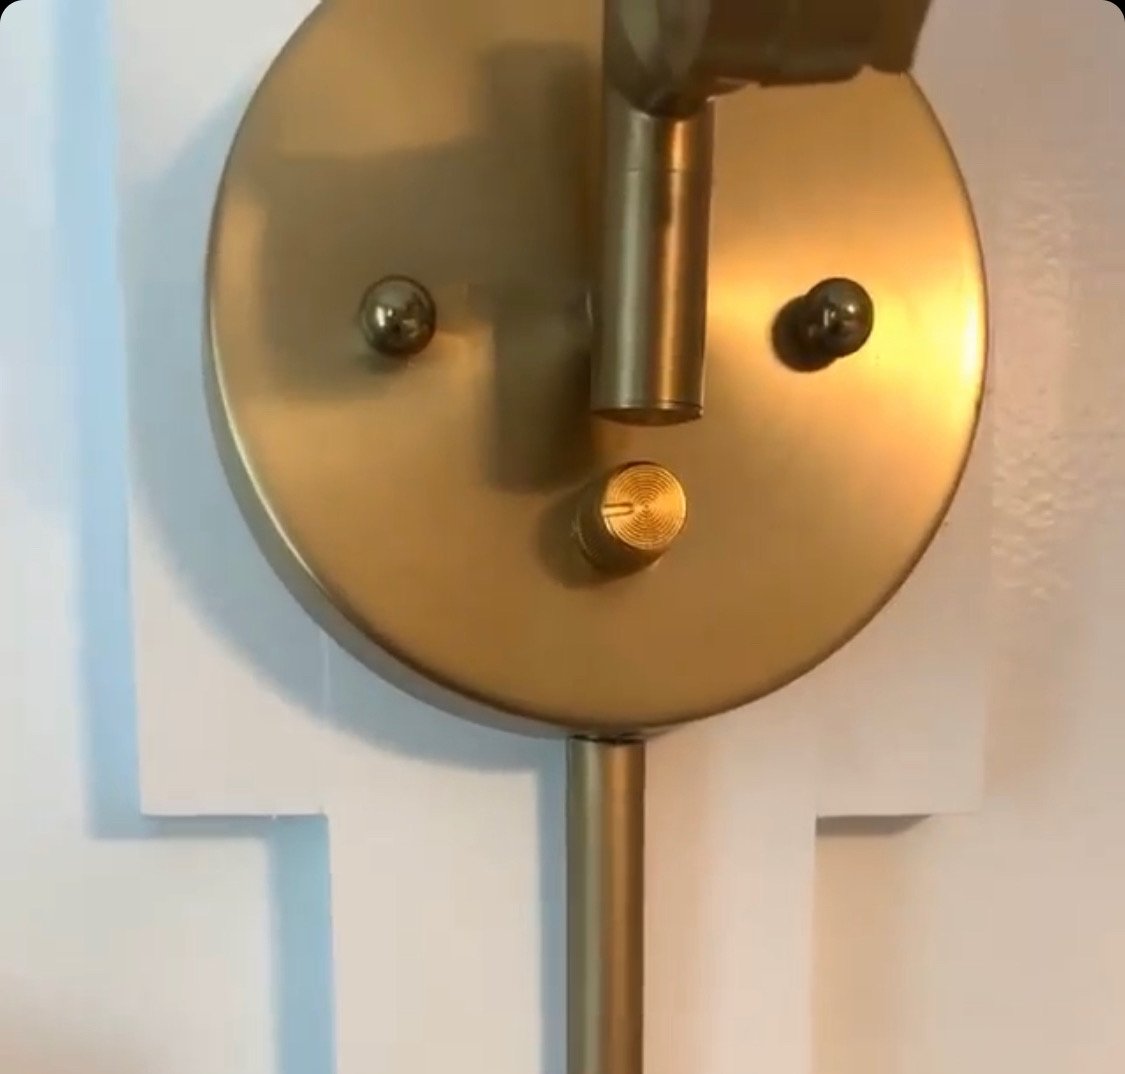
I am so pleased and excited about how these turned out! Keep scrolling to see the end result. I truly don't think you would ever know it wasn't part of the light which was my main goal.

To all you ladies out there... this goes to show that WE CAN DO THIS! I empower and encourage you to take on those home projects by yourself. You have the ability and power to accomplish any home project that you set your mind to!